 If you’ve had homemade pickles, you know there’s nothing like them. The store bought ones can’t hold a candle to these! These pickles are slightly spicy, and full of flavor, and have a nice kick to them.You must make these! The best cucs for making pickles are gerkins. We’ve had an amazing fall, so, even though it’s a little late to make these, you should be able to find them in the farmer’s markets still.
If you’d like some background on canning, check out our you tube channel on canning of tomatoes and peaches. If you don’t want to can these, you can pour hot brine over cucs, seal as you would for canning, and flip upside down. While I never do this, many people do and have had luck with allowing them to ferment and seal on their own in this manner. I’d check the seals once they cool to see if the lids actually sealed. If they didn’t, place into the refrigerator. They will stay good for a few weeks.
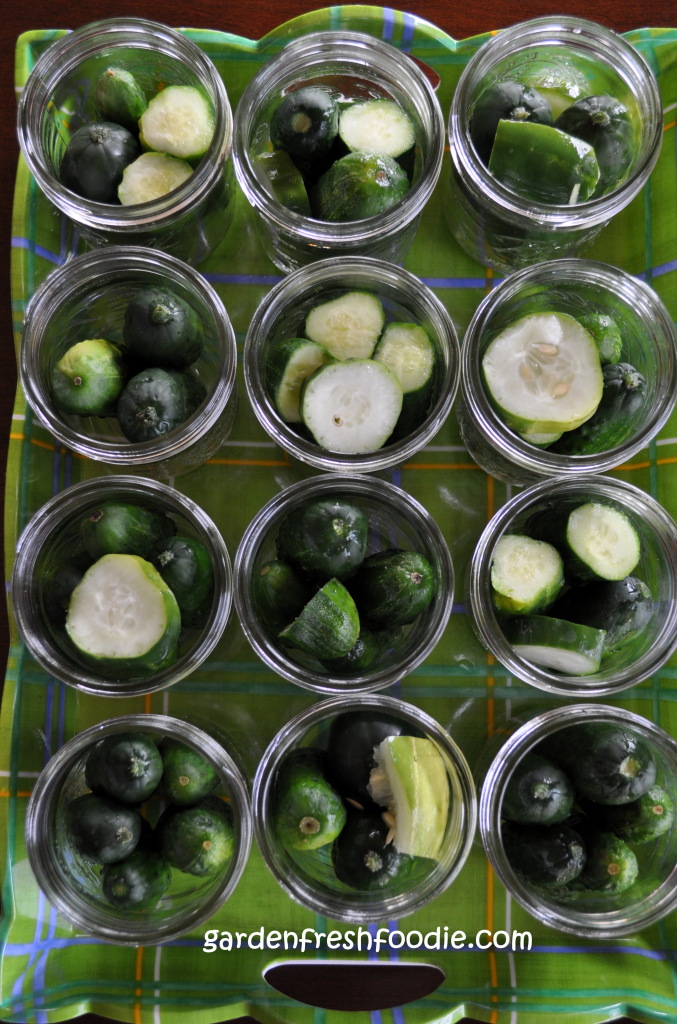
Soak the cucs the night before. This helps them to plump up and stay more crisp in the canning process. The result after canning however, is a softer dill pickle. No crunch to these.
This recipe made 12 pint jars of pickles
Ingredients:
- 4 quarts of gerkin/pickling cucumbers
- 12 wide-mouth pint jars
- 7 c water
- 7 c vinegar
- 1/4 c plus 3 tbsp salt
- 3 tsp crushed red pepper (1/4 tsp red pepper in each jar)
- 12 tsp dill seed (1 per jar)
- 12 garlic cloves (1 per jar)
Instructions:
- Soak cucs overnight in cold water. This helps to plump them up. Clean them, removing any dirt
- Combine water, vinegar, and salt in a non-reactive pot. Heat until almost boiling. This is your brine
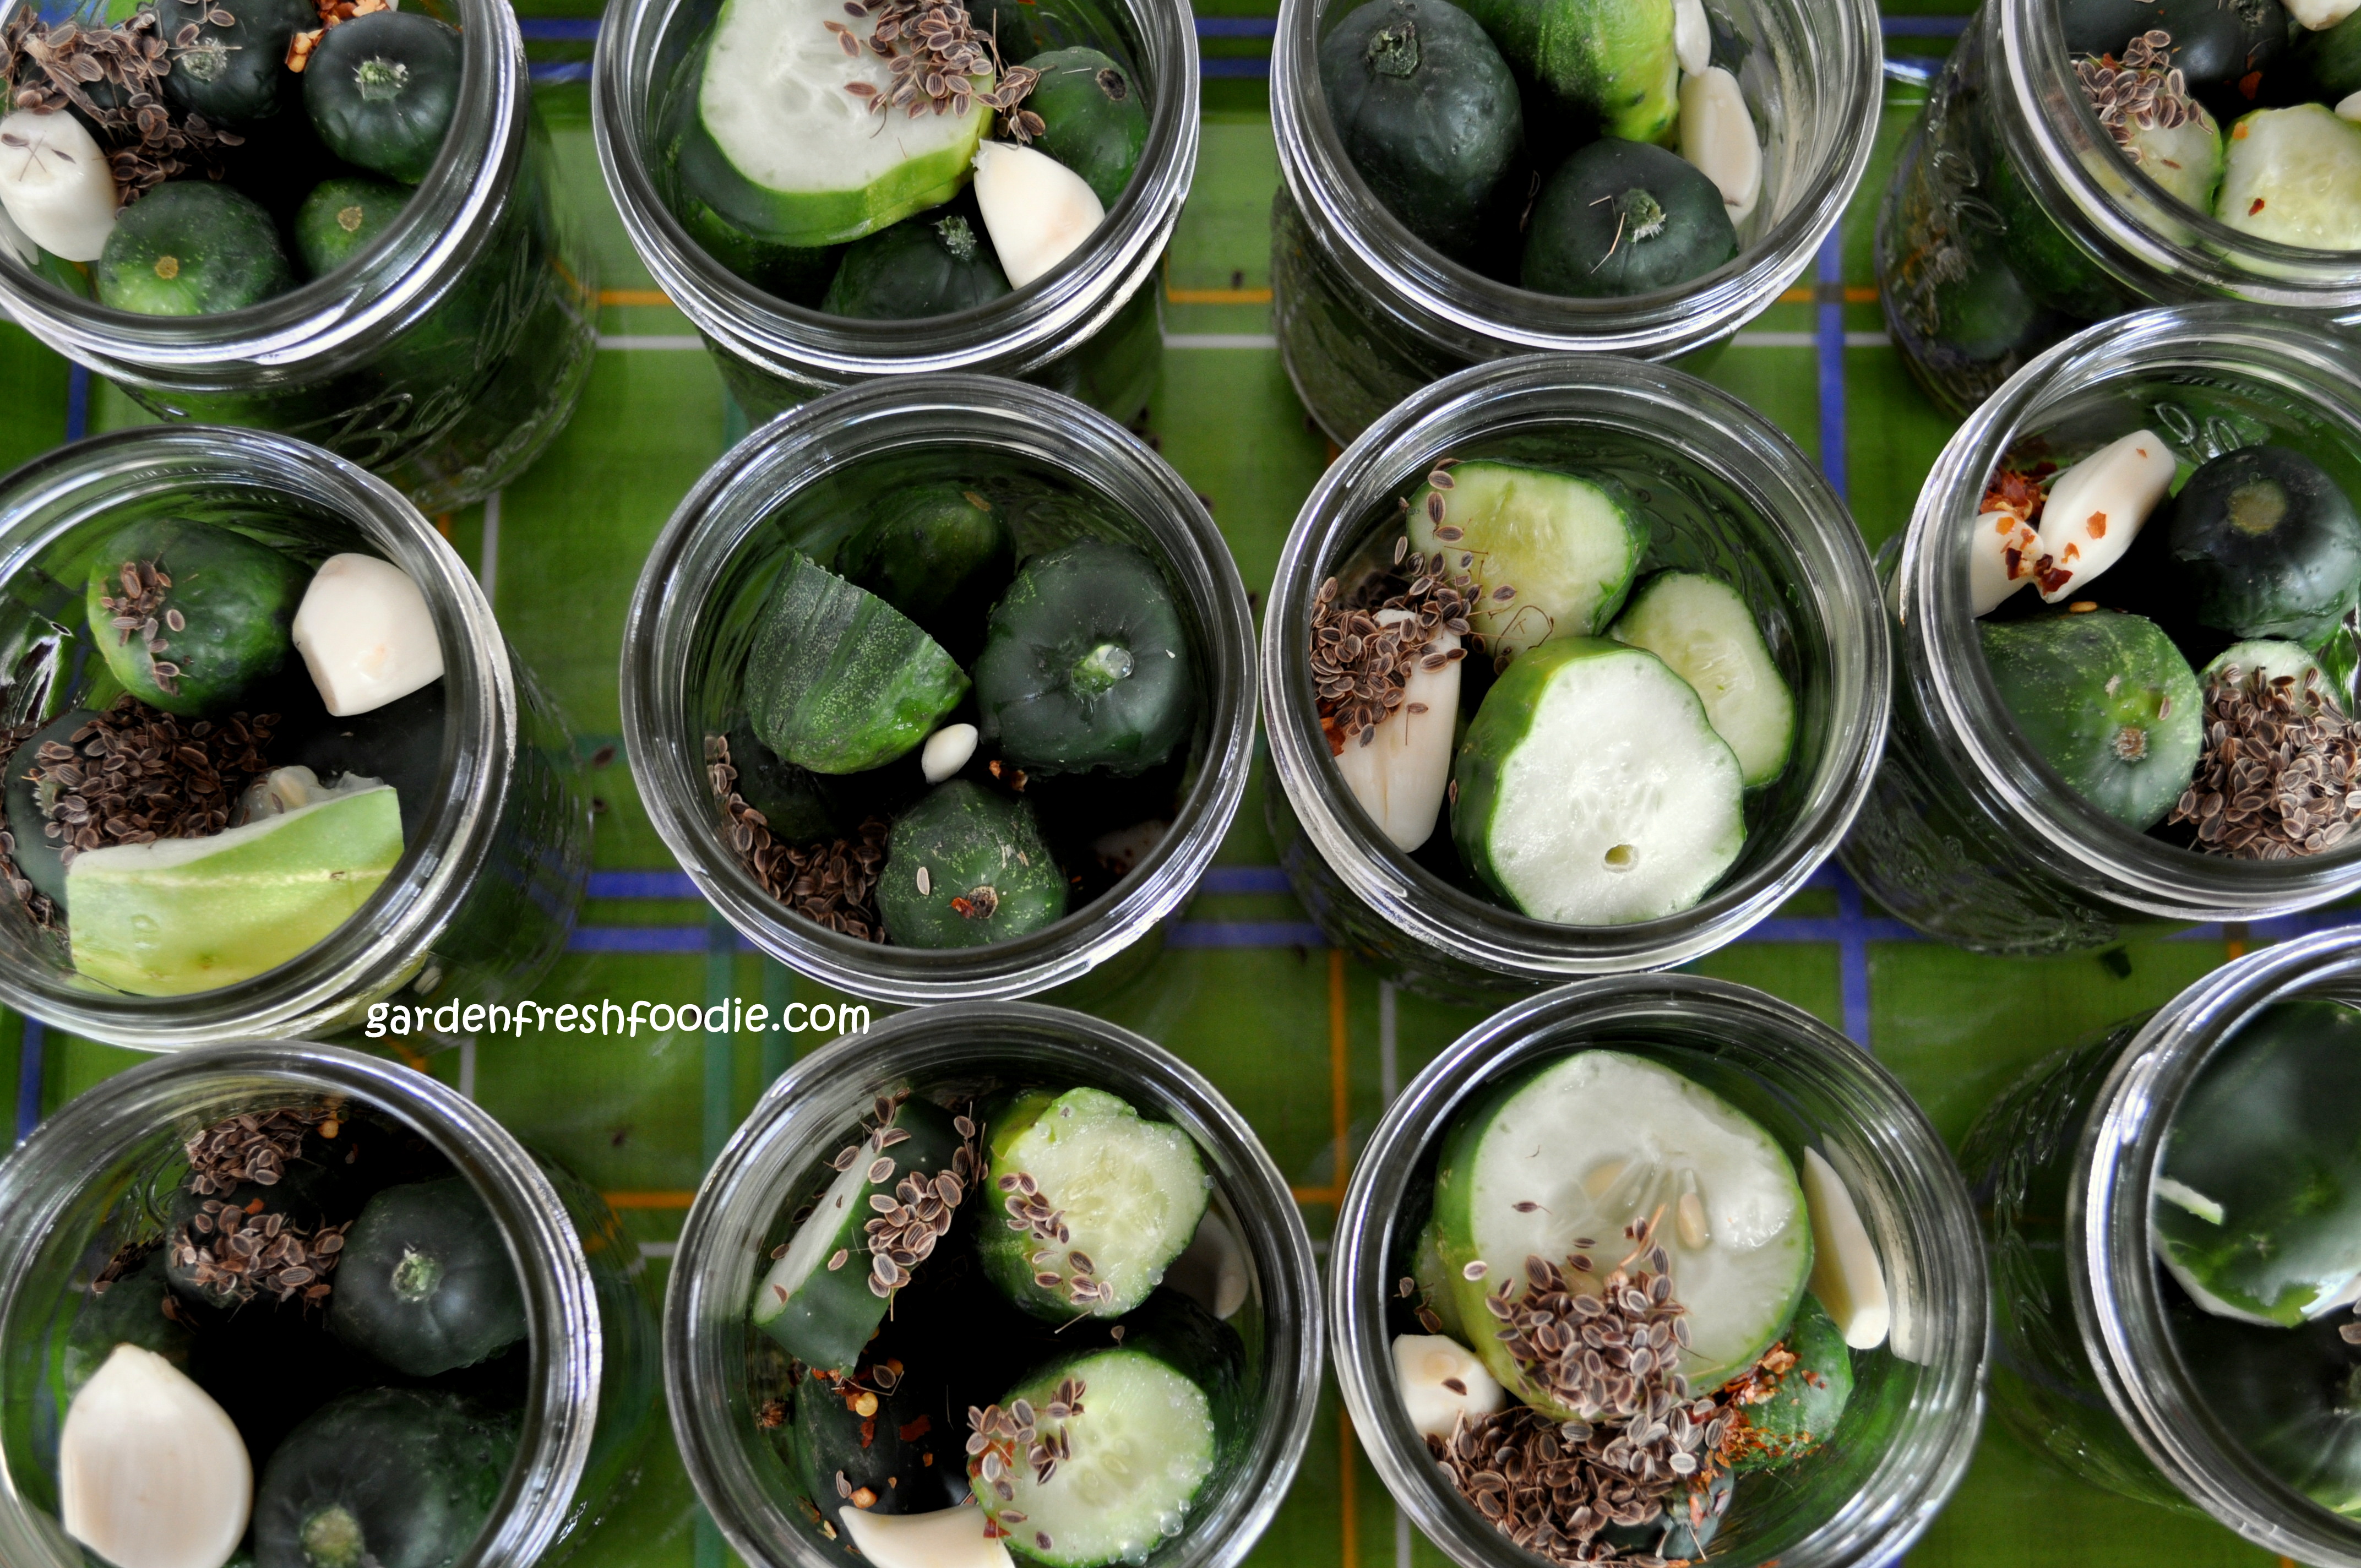
- Pack clean jars with cucumbers/pickles. Make sure cucumbers are below the neck line of the jars (cut them if they need to fit)
- Add 1 tsp dill seed, 1/4 tsp red pepper, and 1 garlic clove to each jar

- Pour hot brine over the tops of jars, making sure that the cucumbers are covered with brine
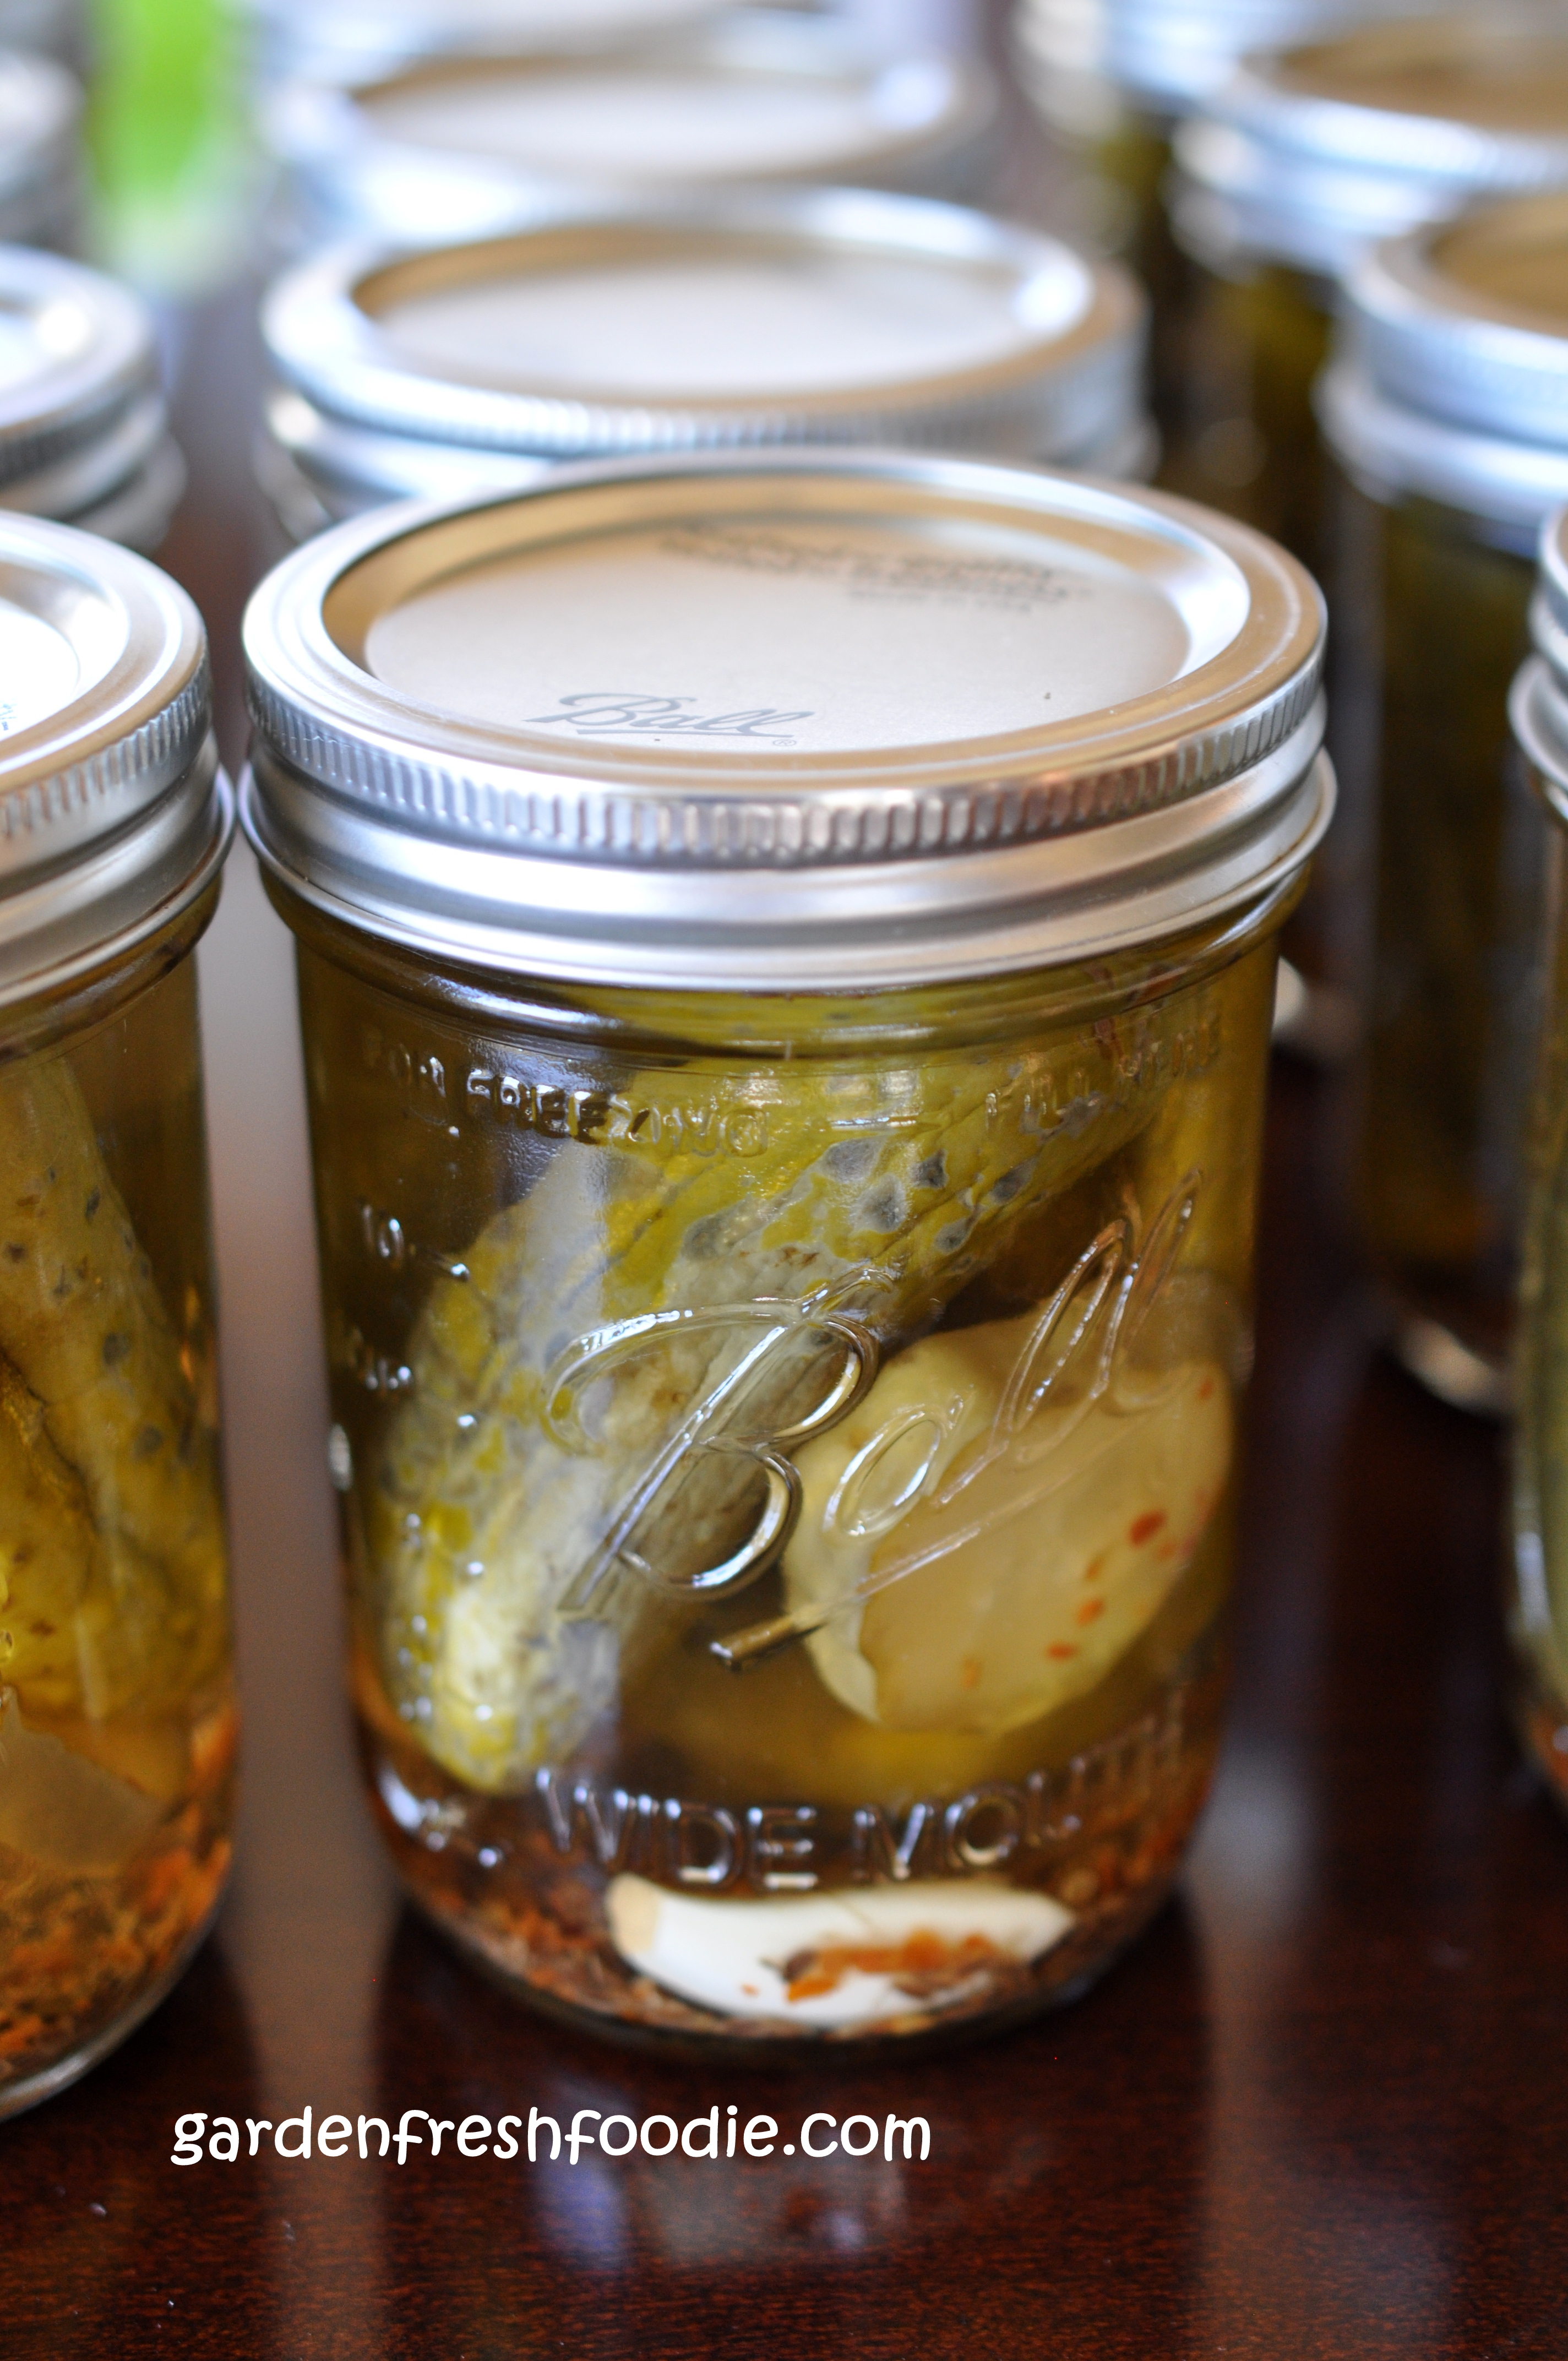
- Place hot lids on top of jars, adjust screw bands and place into hot water canner and process for 10 minutes. Let cool and wait until you hear popping of the lids. Check lids for seals. Enjoy!

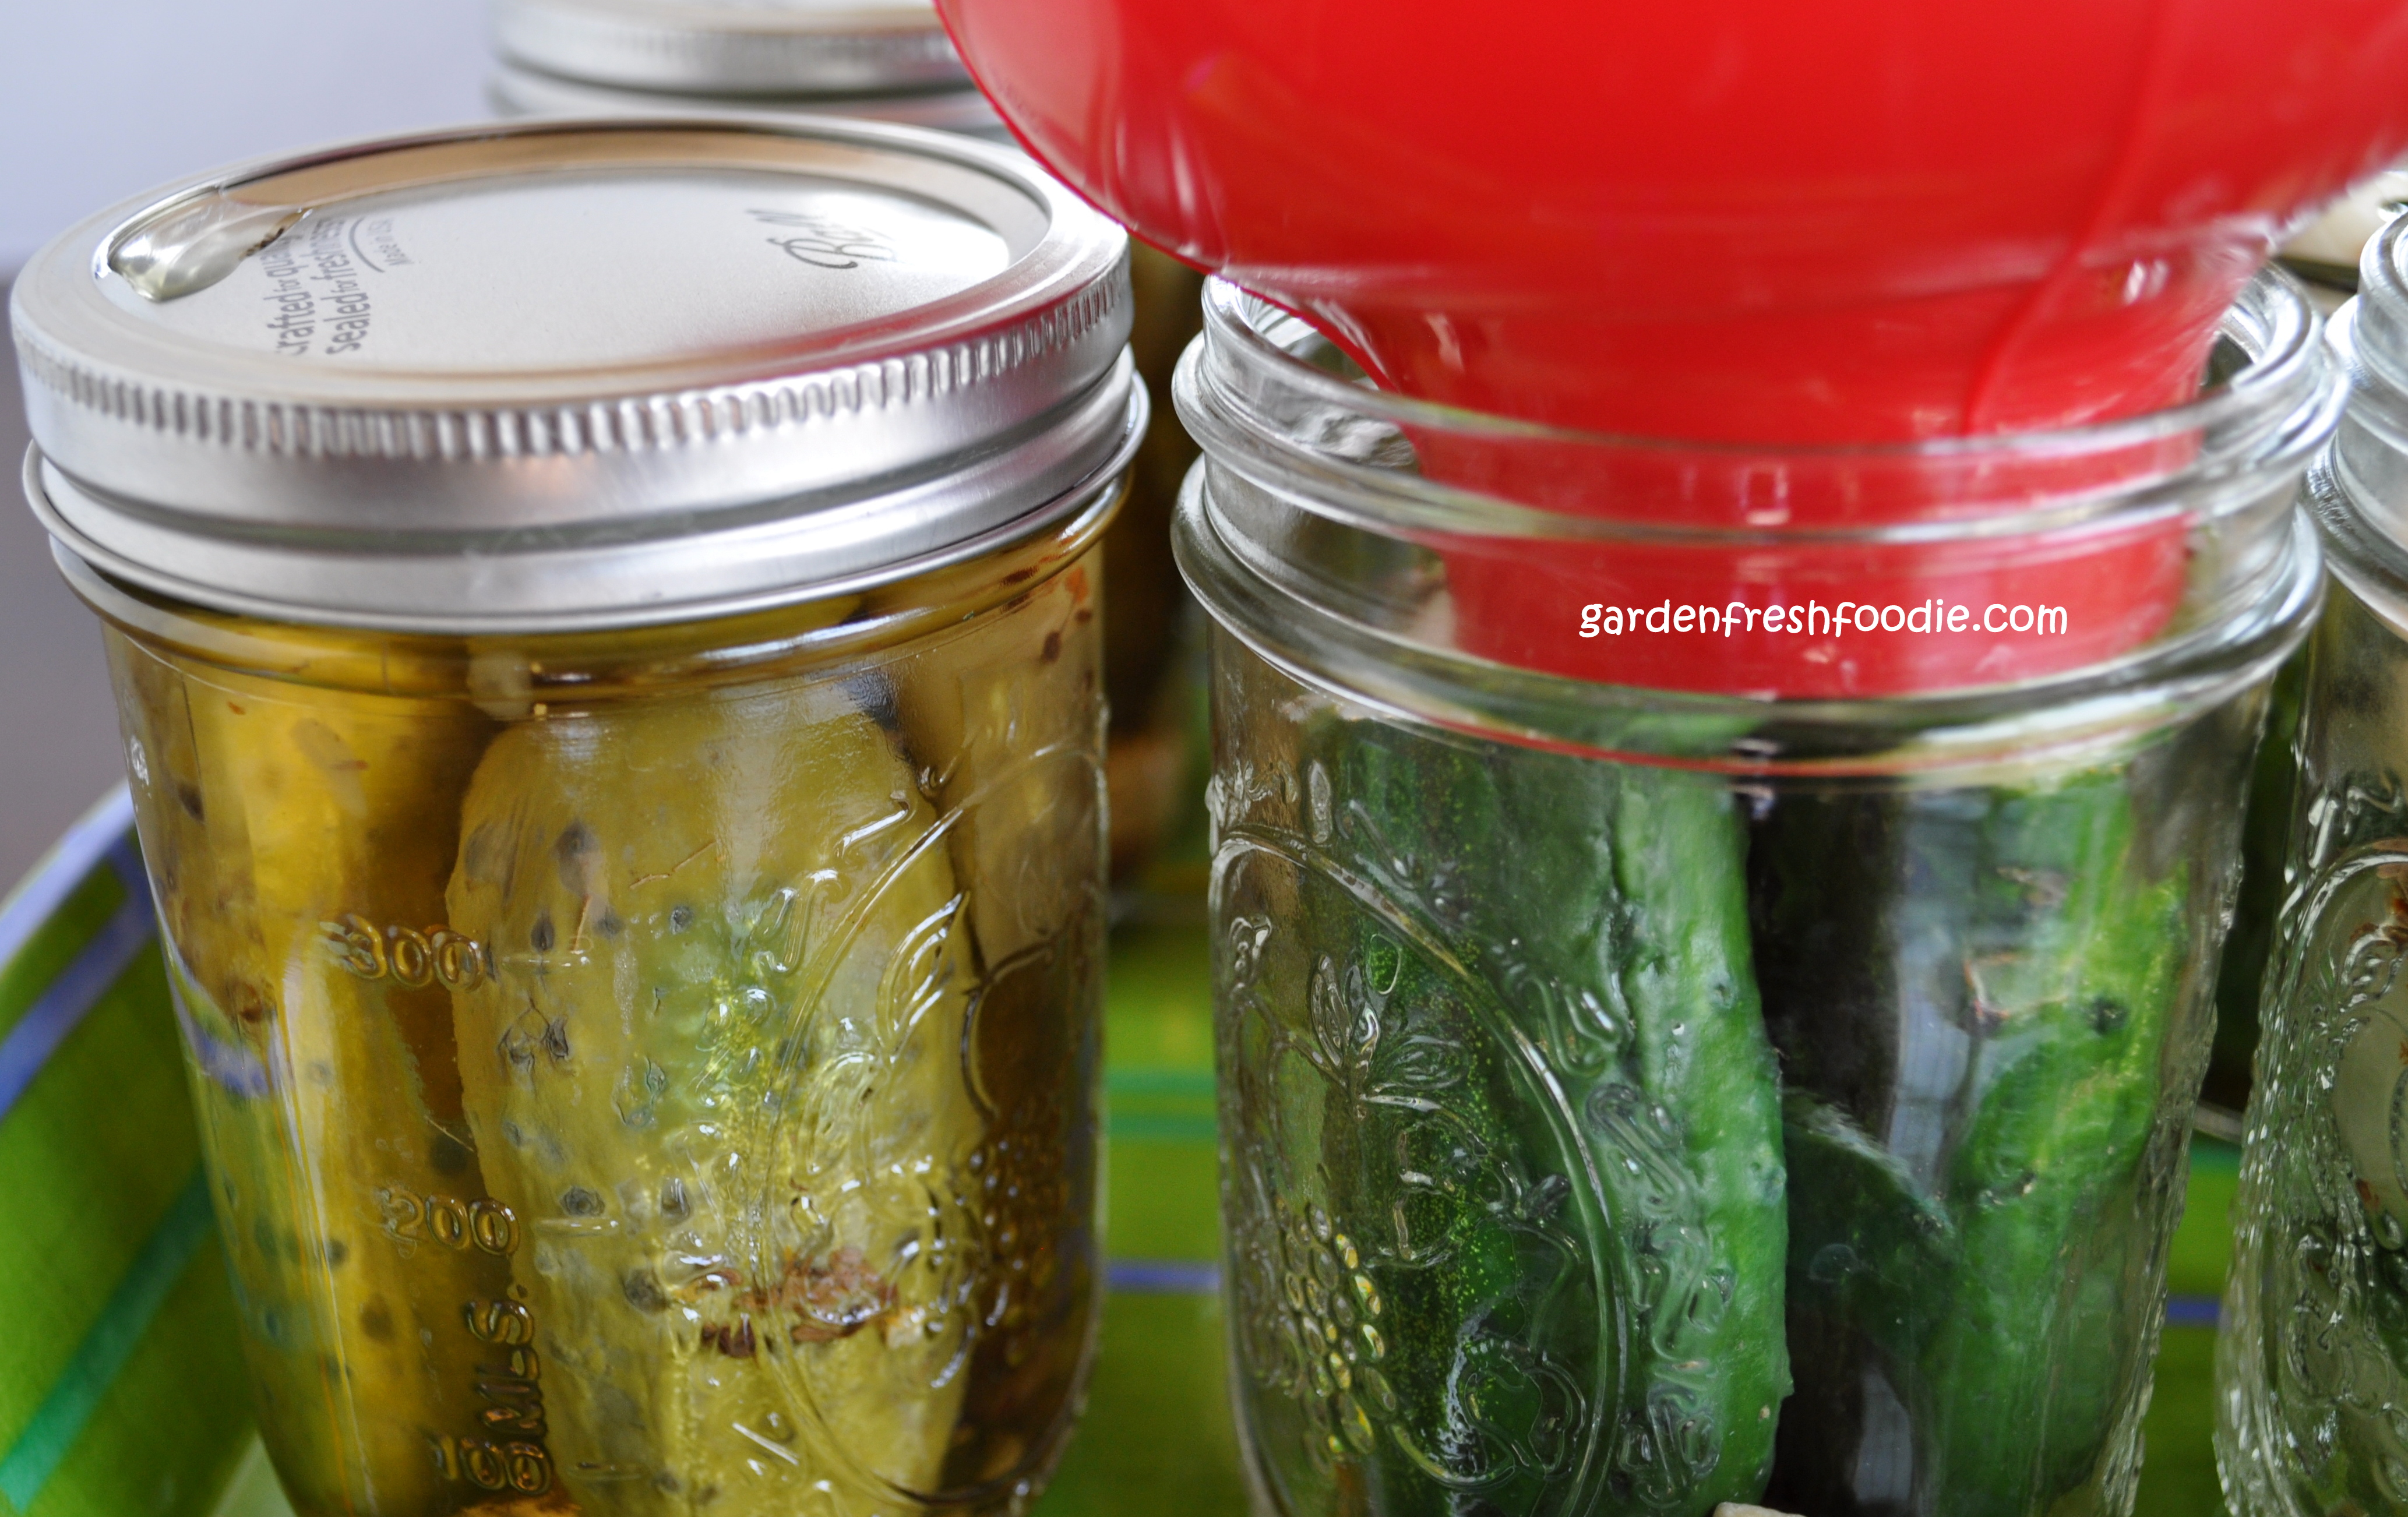
Before and After Canning Process For Pickles
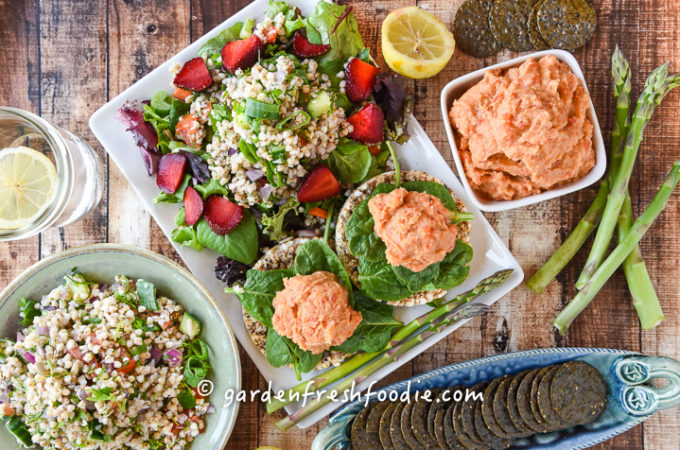
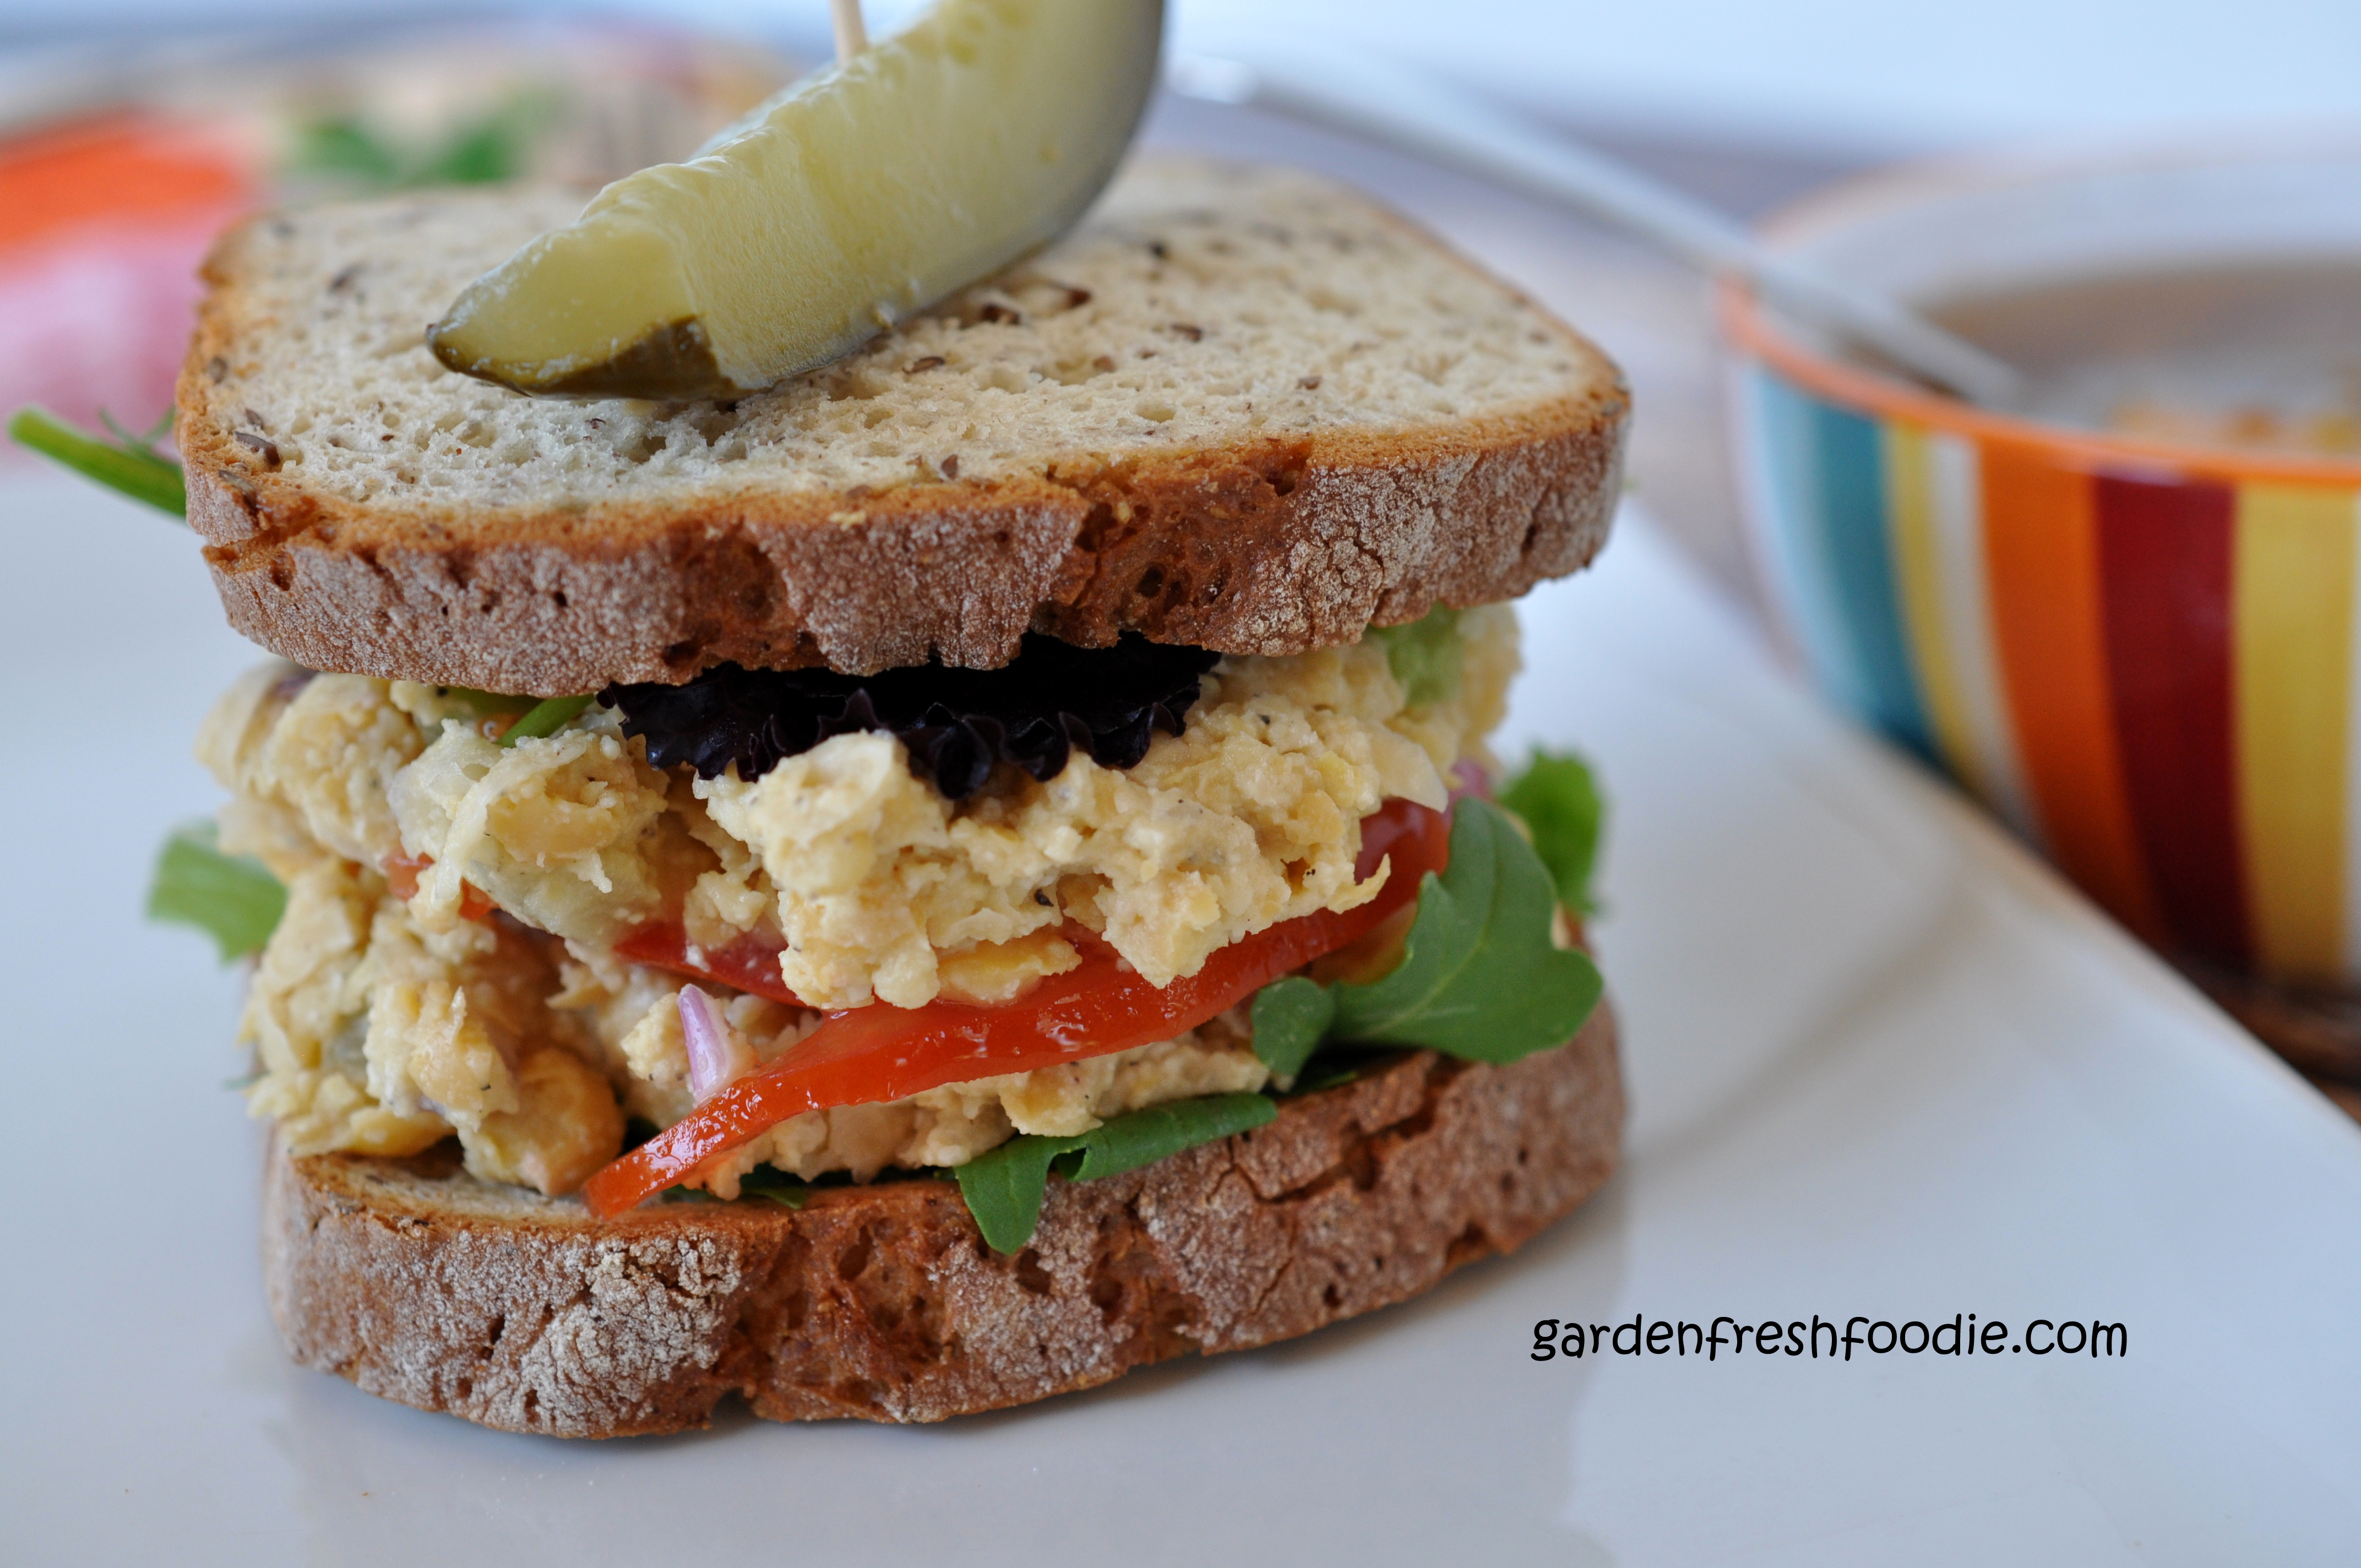
Awesome with this Tuna-less Chcikpea Salad-recipe coming soon…..


Nutritional Benefits:
- No added sugar
- Vegan/gluten free-non-inflammatory
- 4 quarts of gerkin/pickling cucumbers
- 12 wide-mouth pint jars
- 7 c water
- 7 c vinegar
- ¼ c plus 3 tbsp salt
- 3 tsp crushed red pepper (1/4 tsp red pepper in each jar)
- 12 tsp dill seed (1 per jar)
- 12 garlic cloves (1 per jar)
- Soak cucs overnight in cold water. This helps to plump them up. Clean them, removing any dirt
- Combine water, vinegar, and salt in a non-reactive pot. Heat until almost boiling. This is your brine
- Pack clean jars with cucumbers/pickles. Make sure cucumbers are below the neck line of the jars (cut them if they need to fit)
- Add 1 tsp dill seed, ¼ tsp red pepper, and 1 garlic clove to each jar
- Pour hot brine over the tops of jars, making sure that the cucumbers are covered with brine
- Place hot lids on top of jars, adjust screw bands and place into hot water canner and process for 10 minutes. Let cool and wait until you hear popping of the lids. Check lids for seals. Enjoy!