 So, walking through the grocery store you may see some fresh sprouts. Maybe they’ve started to brown slightly. Maybe they look like they are going to be good for only a few more days. Price tag, usually at least $4-5 for about 4 ounces of sprouts. I used to be a person who would buy these. They’d be in my fridge for all of 1-2 days before they started browning out or seeming slimy.
I love the freshness of sprouts, and was always willing to pay for them. That is, until the day I tried sprouting. Once I learned how ridiculously easy and inexpensive it was to sprout seeds, I was hooked! I can’t believe I ever bought those slimy things before! Growing your own sprouts allows you to control the amount, the type, and timing of what you want to eat. It’s also a way to garden indoors year round. So even when the cold winds blow, you can have fresh, crunchy sprouts that you’ve grown. I love that!
Why sprout? Sprouts are packed with fiber and protein. By sprouting seeds you also make the seed/legume/nut more easy to digest. Think of a seed as containing all of the vital nutrients in it to help a plant to begin growing. The seed must contain all the nutrients needed until the plant can begin to grow leaves and produce its own food via photosynthesis. Until that point, it relies on stored energy from the seed. When you sprout a seed, you are swelling the protective seed coat until it opens and the young plant emerges. At this point, it has tons of energy in it. The amount of protein needed for growth (same as for you) is being released to help the plant. Consuming the sprouted seeds within a short period of time allows for you to consume these high levels of nutrients and enzymes in their raw form. Before the plant can produce leaves, it’s high in nutritional density in the form of fiber and protein, while being very low in caloric density.
How hard is it to sprout? Soaking, rinsing, and draining are the only techniques needed. If you are interested in sprouting, start with one kind of bean or seed to start. I make sure that I’m almost always soaking some form of seed or bean, so that once I’ve finished eating 1 jar, I have another ready to be finished. Mung beans are a really great bean to sprout. Many are familiar with the white long bean sprouts in stores. However, sprouting mung beans for a much shorter time won’t give you those colorless sprouts. You’ll get much more nutrition out of them if they are sprouted for only a few days. Pictured below is the way I like to eat my mung sprouts. 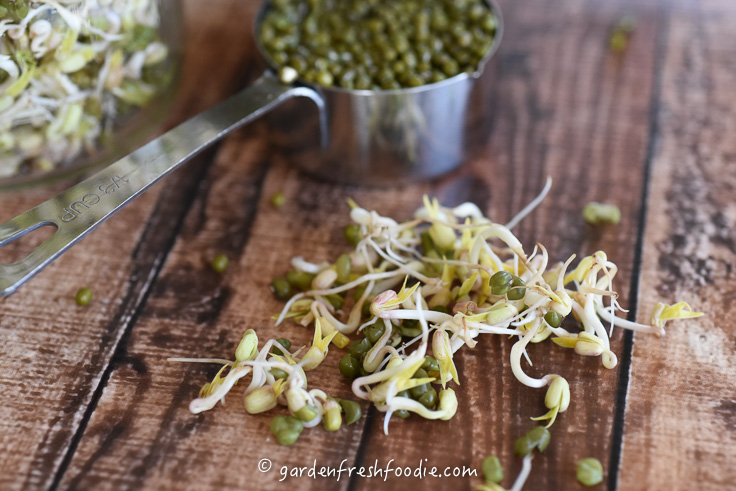
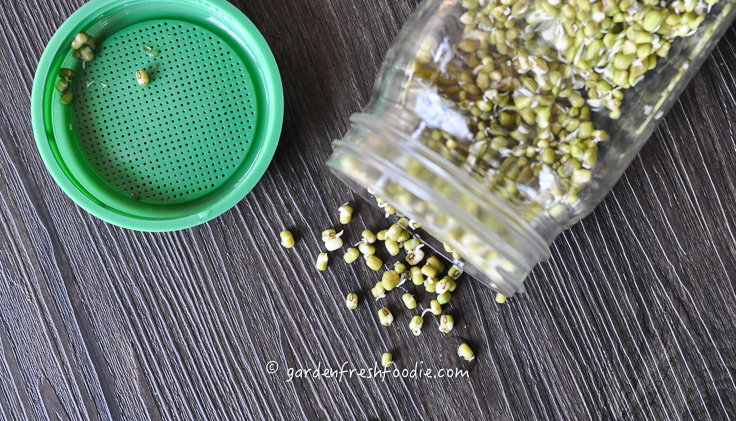
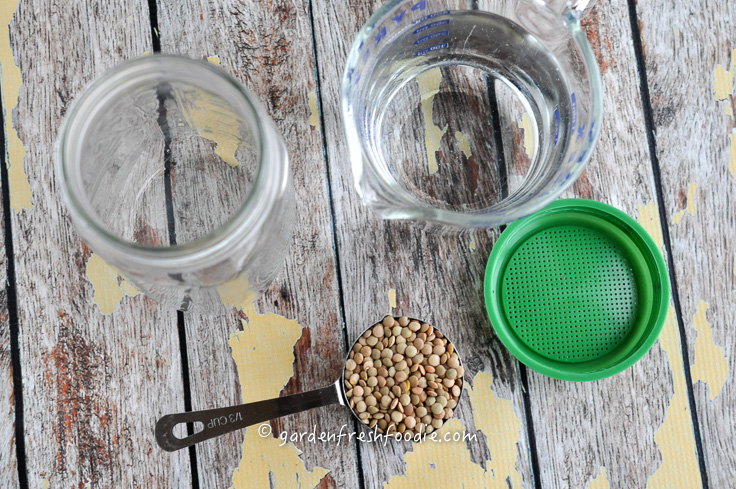
The process is inexpensive and easy. I use a Ball Canning Jar (my fav) and this Sprouting Wide Mouth Jar & Strainer Lid, that you can get on Amazon. For alfalfa seeds, click here.
 You can sprout just about any pantry grade bean or seed. I purchase my beans in bulk and first tried sprouting some organic brown lentils I had. From start to finish it took me about 4 days for the lentils. I have sprouted lentils, mung beans, alfalfa, and broccoli seeds. Our house favorite is the alfalfa. Plus-alfalfa is ready in 2-3 days (they aren’t as high in protein, as compared to lentils or mung beans).
Fresh Alfalfa Sprouts
Materials Needed:
- Canning Jar (we use clear ball canning jars)
- Sprouting Wide Mouth Strainer Lid or cheesecloth
- Seeds of choice, I like Handy Pantry Certified Organic Alfalfa Sprout Seed if buying or same company for broccoli, or use any organic bean/seed.
Instructions:
- Place small amount of seed into a quart sized jar. For mung beans and lentils I use 1/4 cup and for broccoli or alfalfa seeds I use 2 tbsp.
- Cover with filtered water overnight or 8 hours
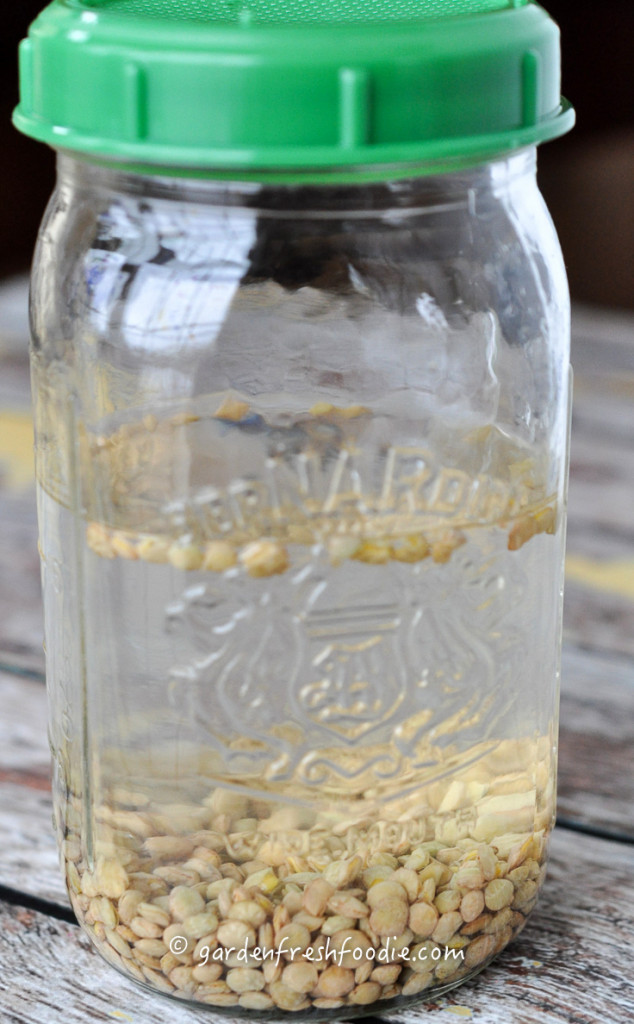
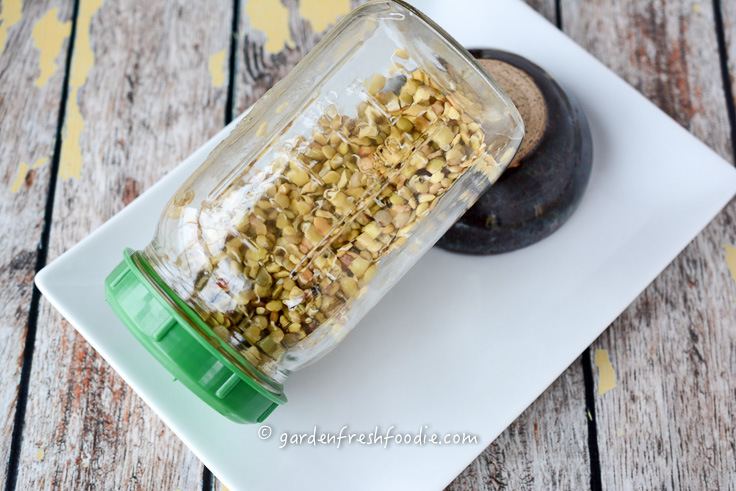
- Drain. Rinse with fresh water and tip upside down to drain. Place on side to aid in drainage and prevent the seeds from sitting in water. It’s best to keep sprouts out of direct light on counter.
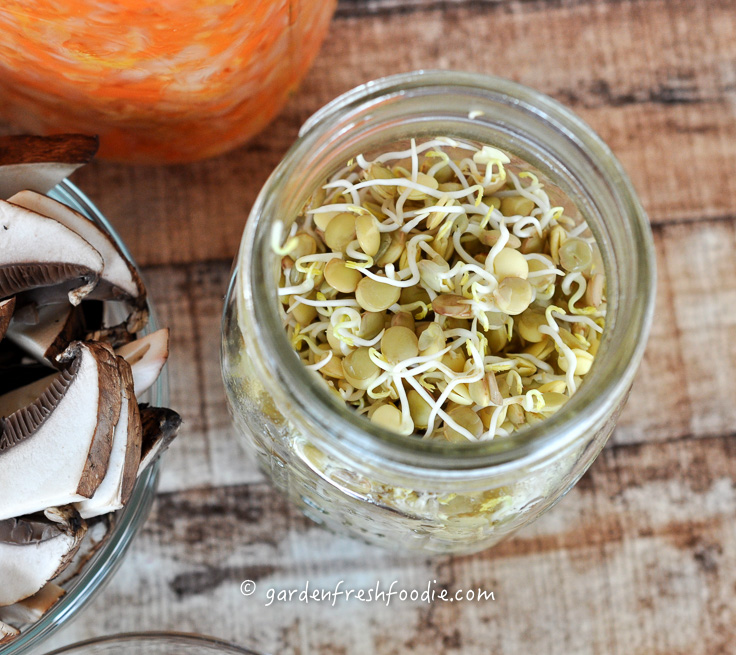
- Repeat rinse and drain cycle 2xs each day until sprouts taste and look like you’d like, about 2-3 days for broccoli and alfalfa, 4-5 days for mung beans and lentils. They will end up filling the whole quart. I rinse and drain before leaving for work and before going to bed each day.
Lentil Sprouts
- Once to optimal size/taste, dump and place on a towel to remove any added moisture. Return to container and place into refrigerator. Sprouts will last for at least 1 week.
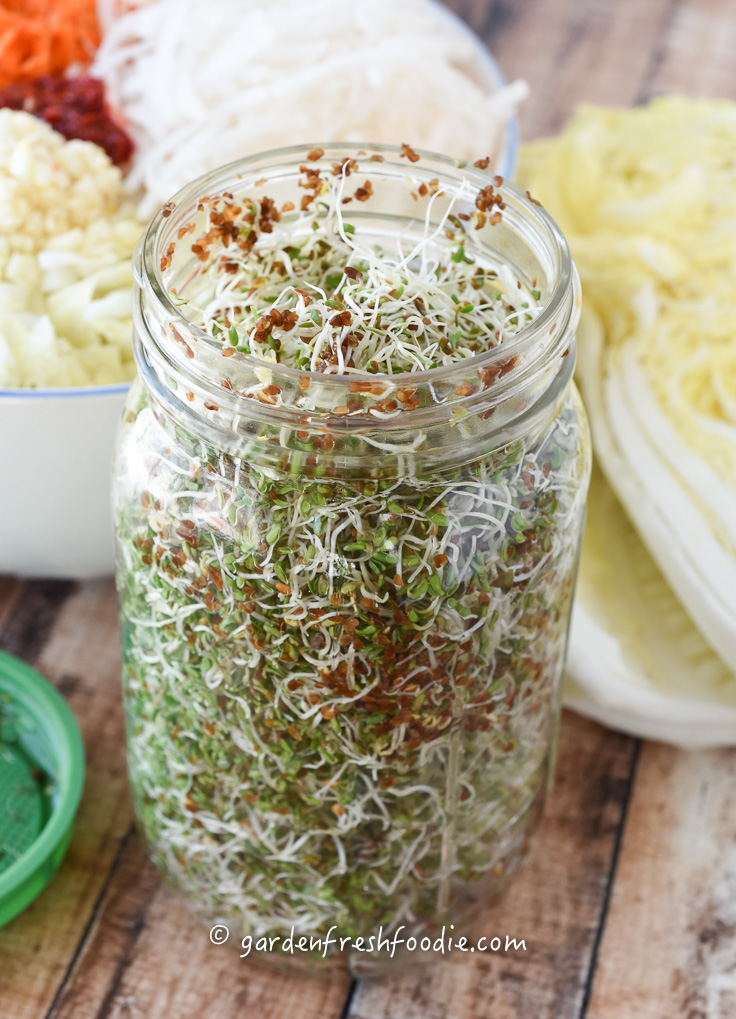
- Serve in wraps, atop your fav salad, eat as a snack, or garnish soups and stews for added texture. They’re also great on their own as a power snack! Shown below is my ginger carrot kimchi topped with alfalfa sprouts.

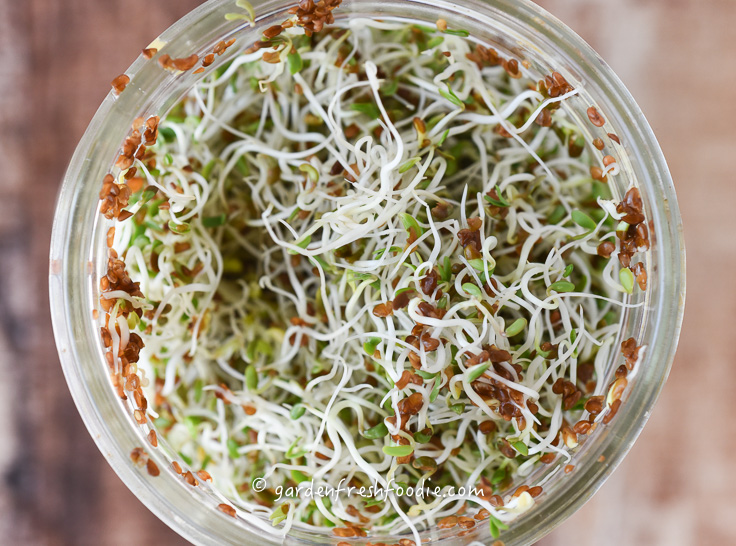
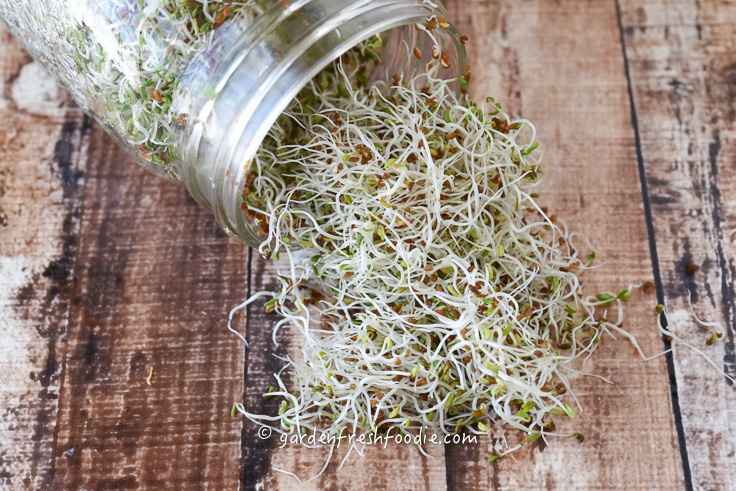
Freshly Grown Alfalfa Sprouts

Mung Beans: Rinse and Drain for about 4 days
 Lentils: 4-5 days rinsed and drained
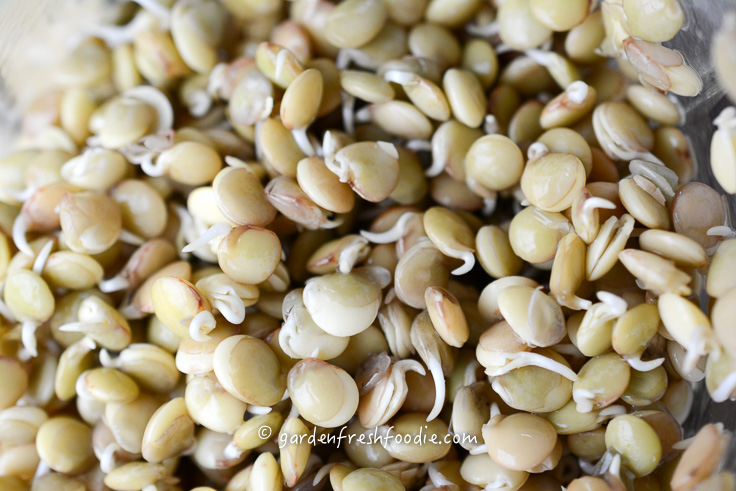
Day 1 Sprouting Lentils Up Close

Completed Lentil Sprouts
Alfalfa: 3 days rinsed and drained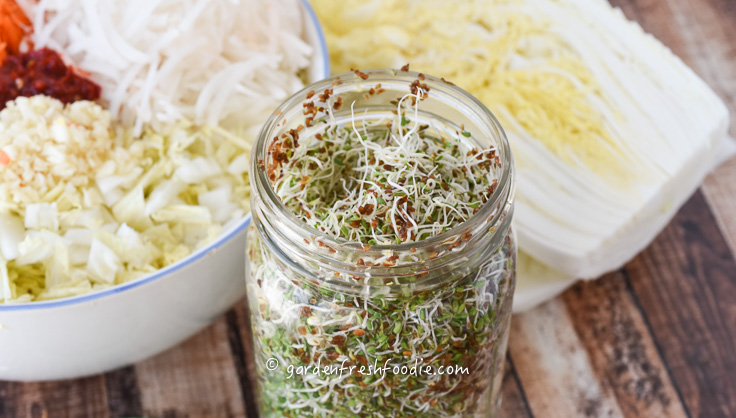
- Materials Needed:
- Canning Jar (we use clear ball canning jars)
- Sprouting Wide Mouth Strainer Lid or cheesecloth
- Seeds of choice, I like Handy Pantry Certified Organic Alfalfa Sprout Seed if buying or same company for broccoli, or use any organic bean/seed.
- Place small amount of seed into a quart sized jar. For mung beans and lentils I use ¼ cup and for broccoli or alfalfa seeds I use 2 tbsp.
- Cover with filtered water overnight or 8 hours
- Drain. Rinse with fresh water and tip upside down to drain. Place on side to aid in drainage and prevent the seeds from sitting in water. It's best to keep sprouts out of direct light on counter.
- Repeat rinse and drain cycle 2xs each day until sprouts taste and look like you'd like, about 2-3 days for broccoli and alfalfa, 4-5 days for mung beans and lentils. They will end up filling the whole quart. I rinse and drain before leaving for work and before going to bed each day.
- Lentil Sprouts
- Once to optimal size/taste, dump and place on a towel to remove any added moisture. Return to container and place into refrigerator. Sprouts will last for at least 1 week.


I was saving my spaghetti sauce (oil free) jars, bought a laundry bag (netting) and cut it up and use produce rubber bands to hold the netting in place so I didn’t need to buy anything but the seeds. My favorite is broccoli seeds. I have five jars going at a time. Placing them near a window the last couple days helps them turn green.
Great Brenda! I love sprouting, and yes, putting them by the window for only the last day is a great thing to green them up. You don’t want to go too long, as you’re then missing the maximum nutrition window for the sprouts. Happy sprouting!
I always thought sprouting was hard however after reading your step by step instructions, I feel like I can attempt this. Your site is so informative and beautiful at the same time. I love learning about food and how it can nourish our body. Thanks to Ocean Robbins for bringing your site to my attention.
Thanks so much Gail! I appreciate your comments! Sprouting is very easy, and so much more affordable than buying them. Plus-you can be sure they’re as fresh as can be, and important component to keeping valuable nutrients intact! Enjoy, and feel free to ask questions 🙂
Can you freeze them once sprouted to extend their fresh & nutritional expiration?
Kimberly-you can freeze sprouts, provided they’re dry before storing in a freezer bag. However, the texture will not be the same as when they are fresh. Think freezing a pepper and then defrosting. They’re usable, just mushy, and best for cooking. I have never frozen my sprouts, as what I like best about them is that they’re fresh and crunchy. Experiment with it!
Broccoli sprouts take 5-7 days to green ready to use. I noticed you don’t mention rinsing in a bowl of water to remove unsprouted seeds. Do you eliminate the final rinse step? I have been sprouting broccoli seeds and lentils for 5 weeks. I also plan to grow lentil microgreens. I haven’t found the best, out of the way, spot for all my jars! My family isn’t sure of my sanity.
LOL TJ! You should see my kitchen right now! Sprouting, making kimchi, and fermenting cauliflower/carrots, along with the dehydrator going with apples. A sure sign fall is here! I don’t remove seeds, but you of course can do that. I do tend to eliminate rinsing before putting away in fridge, as you don’t want them to stay wet. I make sure to place them in a dark corner on my kitchen counter. You want to keep them out of the light, until you wish the broccoli sprouts to green up, and then place in window for the day. Enjoy!
I keep my jars upside down in my dish drain and cover with kitchen towel.
That works too!