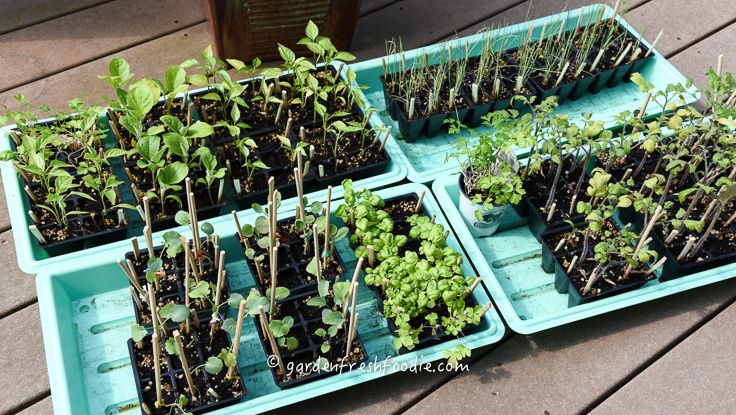
 The seedlings you started over the winter are now screaming, get me out of these containers!!! I’m too big mom, let me grow! Shhh….don’t tell them they’re going to be eaten. We don’t want to ruin it for them. I know we’re all excited to get these babies out into the world, but before you rush to plant, there are some very important tips you must know……
BEFORE YOU CAN EVEN PLANT:
1) Hardening Off: You must harden off your seedlings! What does that mean? Well, your seedlings have been quite sheltered. Just like brand new baby’s skin, they’re fragile and will burn easily. Take your plants out a little at a time before placing them into the ground. Aim for about 4-5 days of this, with each day exposing them to greater amounts of sunshine. For ex. Day 1-1 hour in the sun. Day 2-2-3 hours in the sun. Day 3-3-4 hours in the sun. Day 4-4 hours in the sun. Day 5-5 hours in the sun. Be careful. Being in smaller containers, the plants can dry out very quickly. If it’s going to be very hot, do this is the early morning or late day hours. Mid-day sun isn’t a good way to start off. Here’s a video explaining just what I mean. Also, if it’s really windy, don’t put them out. They’re very fragile and aren’t used to the wind (they can break). Either shelter them, or place out when it’s calm.
2) Soil pH: If this is a new garden-test your pH. You want a slightly acidic soil, between 5.5-6.5, as veggies like it slightly acidic. To find out your soil pH, take a few samples to a local garden store or buy a test kit (similar to like how you’d test your pool’s pH), or more easily-a Soil PH Meter. If soil acidity is too low (below 5), add some basic components, like lime and greensand. If it’s too basic, add in some soil acidifier like potash, or use an Epsoma brand product called Hollytone (this is great for all acid loving plants like evergreens, lilacs, berries, and hydrangeas).
3) Fertilize! Start any new garden off with some fresh compost and some organic fertilizer. PLEASE forget the miracle grow!!! For a good all-purpose fertilizer, I like Epsoma’s Plant Tone or their Biotone Starter. Home Depot & Lowe’s usually carry this, but I always buy my stuff from a local garden store. Sprinkle this all over your beds each month of growing, and work it into the soil/between plants.
So You’re Ready To Transplant?! Make sure there’s no danger of frost.
1) Danger of Frost: frost is no laughing matter for a farmer/gardener. If you are putting your tomatoes basil, and peppers out too early, those tropical beauties will not be so beautiful any more! Many of our veggies are tropical by nature, the reason they’re not a perennial, and don’t come back each year. Be sure to watch the weather, and know the typical planting date in your area. For me, it’s usually around Memorial Day. But this climate change stuff is wacking out our weather patterns lately!
2) Removal: Remove your plants from their packages. If you purchased from a nursery, your plants may be root bound. What does that mean? It means the roots ran out of room and started growing in a circle around themselves. You need to loosen the roots so that they can hang downwards. This will help them take hold of your soil better, and stop them from continuing to grow in the spiral formation.
2) Burying: Take your seedlings and bury them low in the soil. Why? Because your stems are fragile. They’re not used to the winds. They need to build up their strength, but do that better when growing outside in natural conditions. So take the jump start you created, and plant it low, allowing the top few inches to peak out. Want to know how to plant your tomatoes? Check out this post on how to plant leeks and tomatoes with an accompanying video on the early spring garden.
3) Spacing: Space your plants about 1 foot apart. For tomatoes, you ideally want to space them about 1 1/2-2 feet apart, but I always get carried away and yell at myself later in the season. I tend to stagger my plantings in a zig-zag formation. Your plants will be more productive if spaced correctly. If planting by seed directly, read the seed pack. If you feel that once they’re growing, things have gotten a little too close for comfort, simply cut back some of the seedlings. This is called thinning out (more on this in another post). If you really want a list of how to space, I HIGHLY recommend my favorite book. If you click the pic, it’ll take you to Amazon:
3) Watering: Be sure to water your newly transplanted plants in well, right after transplantation. They are very at risk of shock right now. Be sure to water them well once a day, or twice a day if you hit a hot streak. Once they’re established, they won’t suffer from the heat as much. These first weeks are very important for watering. Try to water in the morning, giving the plants the whole day to dry out. Also water the base of plants. This helps to prevent the leaves from getting too wet, and creating a great place for molds and funguses to grow (we don’t want that!). Watering at night isn’t ideal for this reason. Plants tend to stay too wet over night and can get many fungal diseases this way. If you must water at night (and of course I’ve had to do that!), try to water when there’s still a few hours of sunlight left, say around 5 pm.
4) Row Covers: If you want to protect your plants from insects and cold evening temps, you can get some thin cloth netting. I’ve purchased it at Lowe’s before. It’s sold as frost covers. It can be helpful at protecting from insects, and is especially good to have on hand in case temps drop too low at night. I don’t love to keep it on for a long time, as it prevents the plants from growing to their full potential. This is an example of one: Winter Blanket/frost Cover
That’s it for this segment. Until the next time…happy growing!
